As a children’s book writer, I used to provide my clients with a list of reasonably priced illustrators, but I just couldn’t find book formatters. Or, more likely, I didn’t understand the process.
I’ve read a lot of self-publishing articles, and they explain where to find an illustrator, but NOT ONE OF THEM went into getting your book formatted. This always surprised me because it’s a big part of self-publishing a book.
In my research to find a book formatting service, I came across a couple, and once I started self-publishing book, I learned a lot. And as I updated “How to Write a Children’s Fiction Book,” I documented the steps as I went along so that I could put them in a PDF for my clients, and just as important, so I could remember them. LOL
STEP 1: THE REVISION
I revised my book by removing content, adding new content, editing and proofreading it. If you make significant changes to your cover and/or the interior of your book, you’ll need a new ISBN.
STEP 2: NEW COVER AND BACK COVER
I needed to revise the cover slightly to remove some extraneous text. The formatter/designer I work with is amazing and took care of it. I didn’t make any changes to the back cover.
TIP: Go professional on your book cover.
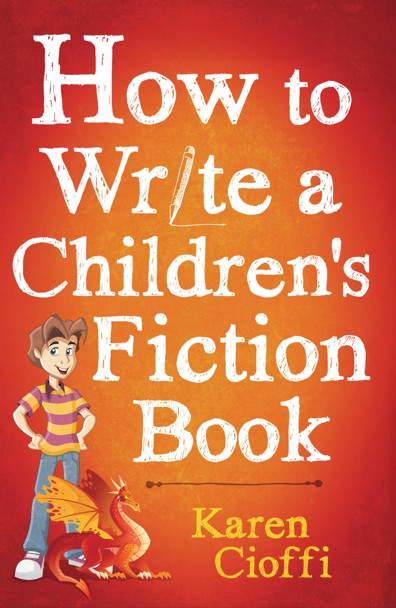
When I first created the book, I used someone on Fiverr. This is never a good idea for your cover. So I had another service redesign it. They asked lots of questions and patiently listened to my concerns. After a few tweaks and providing the image of the boy myself, the designer created a final version that I absolutely loved. Here’s what it looks like.
For the latest book revision, I went with the formatter I use now, for my own books and client’s books.
The designer also created a back cover design. I provided the copy. This is simply a ‘grabbing’ short description of the book. I could have used a headshot for the back cover, but I chose a fun, colorful promo image I created instead.
The formatter/designer will need to know your book size (mine is 6X9), the color paper you want, and whether you have an ISBN.
If they’re professional, they will know what title font will work best. They will, though, listen to your suggestions.
STEP 3: THE ISBN
Since I changed the book cover and did significant rewriting, it needed a new ISBN. I had already bought a set of 10 ISBNs, so I was prepared. I assigned the book a new number.
The book formatter/designer needs the ISBN. It goes on the copyright page and the back cover.
According to ISBN.org:
“The purpose of the ISBN is to establish and identify one title or edition of a title from one specific publisher. It is unique to that edition, allowing for more efficient marketing of products by booksellers, libraries, universities, wholesalers, and distributors.”
If you want to purchase your own ISBN, go to https://www.myidentifiers.com/identify-protect-your-book/isbn/buy-isbn
TIP: If you purchase an ISBN, you’ll need to assign it to your book. You’ll need the book title, a brief description, the cover image, and the book’s retail price. If you’re just not sure of the price, you can go through the process without it.
For more on the ISBN: https://karencioffiwritingforchildren.com/2019/03/17/self-published-book-the-isbn/
STEP 4: THE BARCODE
Since I assigned the book a new ISBN, the barcode on the paperback needed to be changed. I used IngramSpark to publish, and they generated the barcode and placed it on the back cover.
According to ISBN.org:
“A barcode is a graphical representation of your printed book’s ISBN and price – and buying a barcode is a low-cost investment in your book’s success.
Barcodes can also be free. The publishing service (e.g., Amazon KDP, IngramSpark) will place the barcode on the back of your book, whether you use their free ISBN or your own.
There are also services that convert ISBNs into barcodes for free. But often the formatter of your book will do the conversion for you.
If you’re selling only digital books, you don’t need to input the retail price in your barcode. But if you’re selling print books, it is wise to include the retail price in your barcode. The major brick-and-mortar bookstores and book distributors require the price in the barcode for inventory processing and for speed and convenience at checkout.
TIP: Most self-publishers don’t include the book’s price in the barcode for the latter reason. This is what I do for my books.
There’s a lot more on the LCCN in Part 2 of the series. The link is below.
STEP 5: THE LIBRARY OF CONGRESS CONTROL NUMBER (LCCN).
With a new ISBN, I needed to apply for a new LCCN.
According to the Library of Congress:
“A Library of Congress catalog control number is a unique identification number that the Library of Congress assigns to the catalog record created for each book in its cataloged collections. Librarians use it to locate a specific Library of Congress catalog record in the national databases and to order catalog cards from the Library of Congress or from commercial suppliers.
While you don’t have to get an LCCN, it’s free and is a plus to have, and it only takes one to two weeks to get.
You will need to register for it before your book is published.
There’s a lot more on the LCCN in Part 2 of the series. The link is below.
STEP 6: THE INTERIOR DESIGN (FORMATTING)
The book formatter only asked that my book be fully edited, ready to go, and that the cover be finalized.
I emailed the revised manuscript to him and he formatted and designed it the book’s interior.
The formatter/designer will create the title page and the copyright page. You could provide your own copyright page if you want specific wording; this is what I do. The service will also choose the font based on the book’s cover. However, they will work with you if you want a specific font. I left the font in his hands for my book.
Regarding the Contents page and the associated page numbers, the formatter handled that. This is a big deal, so you want to make sure your formatter knows what he’s doing.
TIP: If this is a new publishing project, you’ll need to know the book size, the color paper you want, the paper weight, and the cover finish (matte or glossy). If it’s a revision, it will usually stay the same. It did for me.
TIP2: Always go with a professional formatter/designer.
I hope this helps you on your self-publishing journey!
Read part two of this series at: https://karencioffiwritingforchildren.com/2020/03/01/self-publishing-isbn-barcode-lccn/

I’m a working children’s ghostwriter, book doctor, editor, and self-publisher. I help turn your idea, outline, or manuscript into a book you’ll be proud to call your own—and provide hands-on guidance through every step of the self-publishing process.
OTHER HELP I OFFER:
HOW TO WRITE A CHILDREN’S FICTION BOOK
A 200+ page book that will help you write your own children’s book.
FICTION WRITING FOR CHILDREN eCOURSE
4, 8, or 12 Weeks / 9 Sections / Instructor Guided Self-Study Program
WRITERS ON THE MOVE SELF-PUBLISHING SERVICE
Self-publishing help for children’s authors (picture books and chapter books)
You can contact me at kcioffiventrice@gmail.com
MORE ON WRITING FOR CHILDREN
16 Reasons Why You Should Publish a Book
Are You Determined to Be a Writer?
Your Children’s Fiction Manuscript and a Ghostwriter

7 thoughts on “Self-Publishing a Book – Formatting”